 The next thing you
would need to do when installing a hard drive is first turn off, and unplug
your computer so you do not damage any of the components inside. After pulling
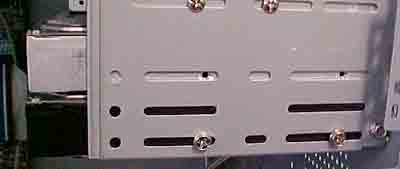
out the plug, open up your case and locate a free 3-1/2" expansion slot in your case
and slide the drive in. After it is in the slot, you have to
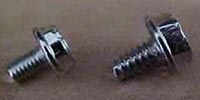
secure it with some screws. The HDD screws we need are case screws, they're bigger
then the floppy/CD-ROM screws. If you use the wrong ones the drive will be loose and could
have the possibility of getting damaged. Remember to screw the drive in nice
and firm.
The next thing you
would need to do when installing a hard drive is first turn off, and unplug
your computer so you do not damage any of the components inside. After pulling
out the plug, open up your case and locate a free 3-1/2" expansion slot in your case
and slide the drive in. After it is in the slot, you have to
secure it with some screws. The HDD screws we need are case screws, they're bigger
then the floppy/CD-ROM screws. If you use the wrong ones the drive will be loose and could
have the possibility of getting damaged. Remember to screw the drive in nice
and firm.
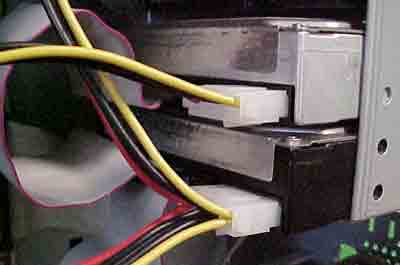
After the HDD is secure in it's slot we
have to attach the IDE cable. It's not very hard and you cannot plug the cable
in backwards. What you need to do is align the red line on the cable to Pin 1 of
the IDE port. All IDE devices have Pin 1 of the IDE port facing the power
connector. After that, all you need is to plug in the molex power
connector.
Now that the actual drive is physically installed
into the computer, you have to partition the drive. There are many different
file systems available, we're going to use FAT32 to partition our 10 GB HDD. The
first thing you need is a boot disk. If you don't already have one or can't make
one for some reason, you can always download them from www.bootdisk.com. When you boot up and go into the
command prompt and type in "FDISK" and press enter. It will bring you to this
rather simple text menu. The safest way to fdisk a drive is to disconnect
the main IDE cable from your original hard drive. This ensures that you won't fdisk the wrong
drive!
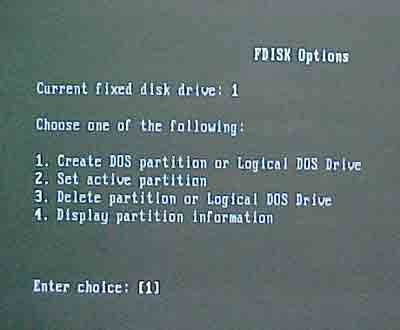
Our 10GB Maxtor
HDD doesn't have a partition yet so what we want to create is a "DOS partition." At this
menu you want to enter number "1" and press enter. That will bring you to
this screen.

Here, we want to create a a primary DOS partition. You can only create a
Extended DOS Partition if you already have a Primary DOS Partition that doesn't utilize
100% of the hard drive space. What I mean is say is that if
our 10 GB Maxtor already had a 5GB Primary partition, to utilize the rest of the
drive, we'd need to create an extended DOS partition. Anyway, we're getting a little
off topic here; we want to create a primary DOS partition. After selecting that
option (number "1"), you will see a percentage scroll from 0-100%. When it's
at 100%, you'll be greeted by this screen.
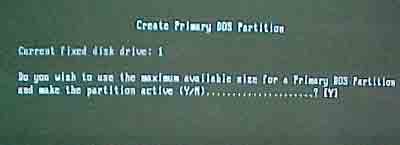
Here, it's asking you if you want to use the whole drive for one big partition.
In our case, selecting "yes" would mean we're going to use the whole 10GB drive
in one partition. Selecting no would allow us to customize the size to whatever
we like. We're going to say yes in this case. After the partition process is done you're
going to have to reboot the computer. Leave the boot disk in the floppy drive
because you will now have to format the hard drive.